
Connect Jira Cloud so Driver can read ticket context and investigate using connected codebases. Enable automatic investigations for the projects where new tickets should receive Driver’s findings.
| Ticketing system | Launch availability |
|---|---|
| Jira Cloud | Available through the Driver Jira app. |
| Linear | Coming soon. |
| GitHub Issues | Coming soon. |
| Intercom | Coming soon. |
| Pylon | Coming soon. |
| Zendesk | Coming soon. |
Pair Jira with Driver
Install the Jira app
- In Driver, open Settings > Integrations > Jira Cloud.
- Choose Install Jira App to open the installation flow for Driver for Jira. The same production app installation link is used for every Driver deployment.
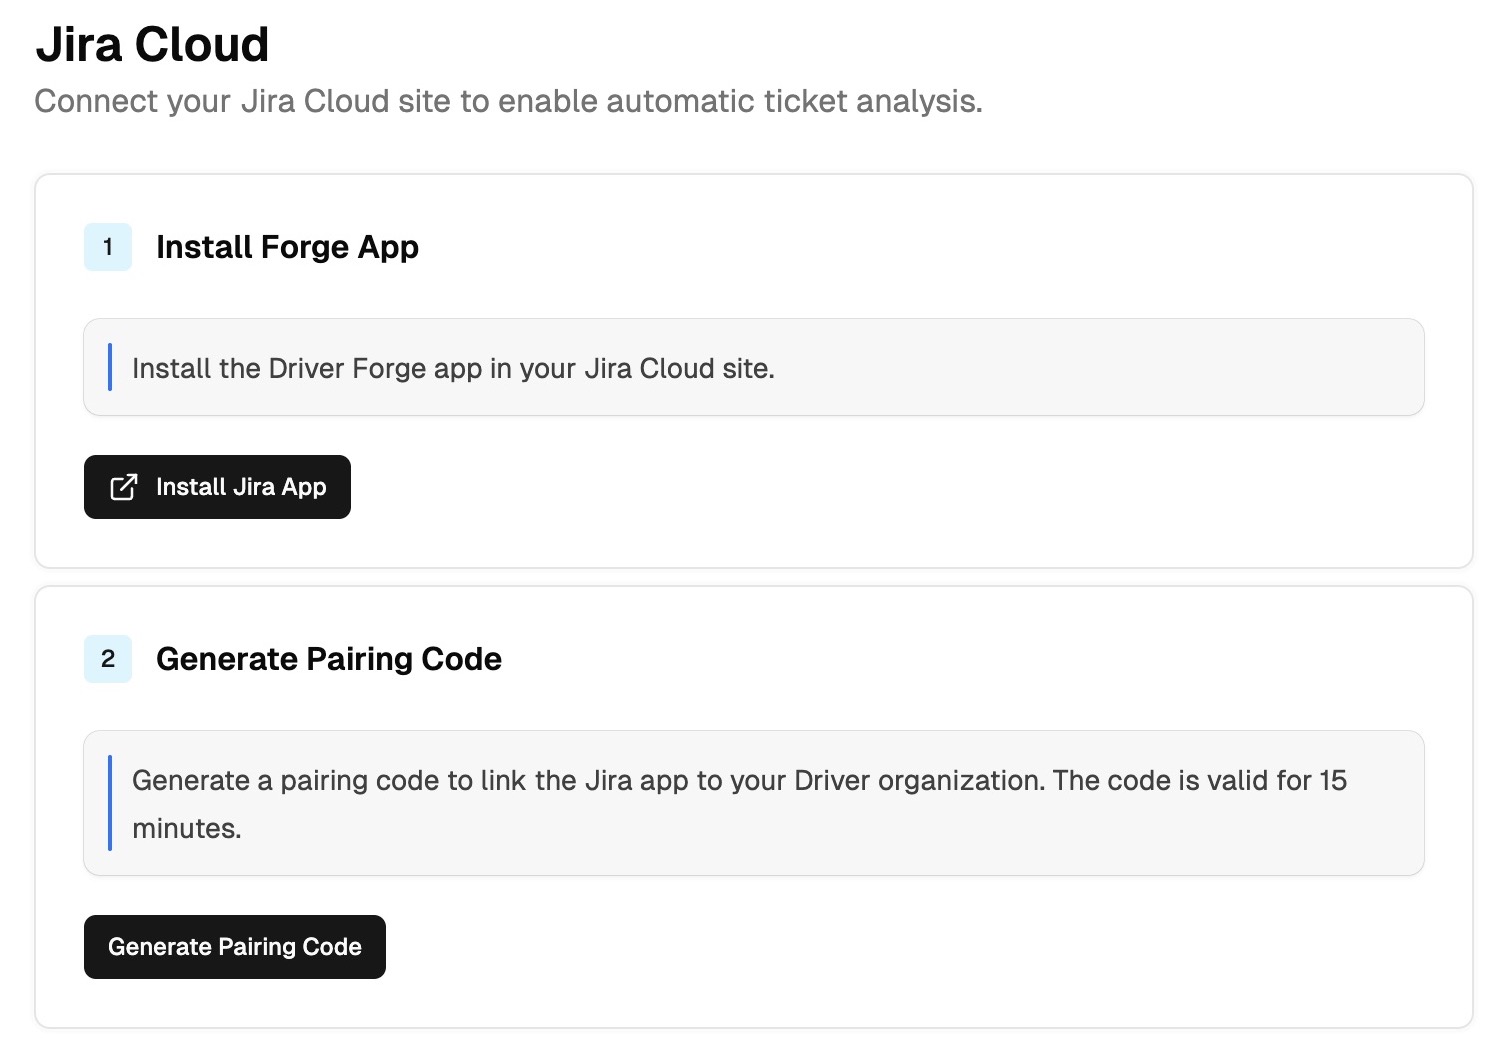
Start in Driver to install the Jira app and generate a pairing code. View full size.
On Atlassian’s installation page, review the requested permissions, choose Get app, and complete installation on the intended Jira site.
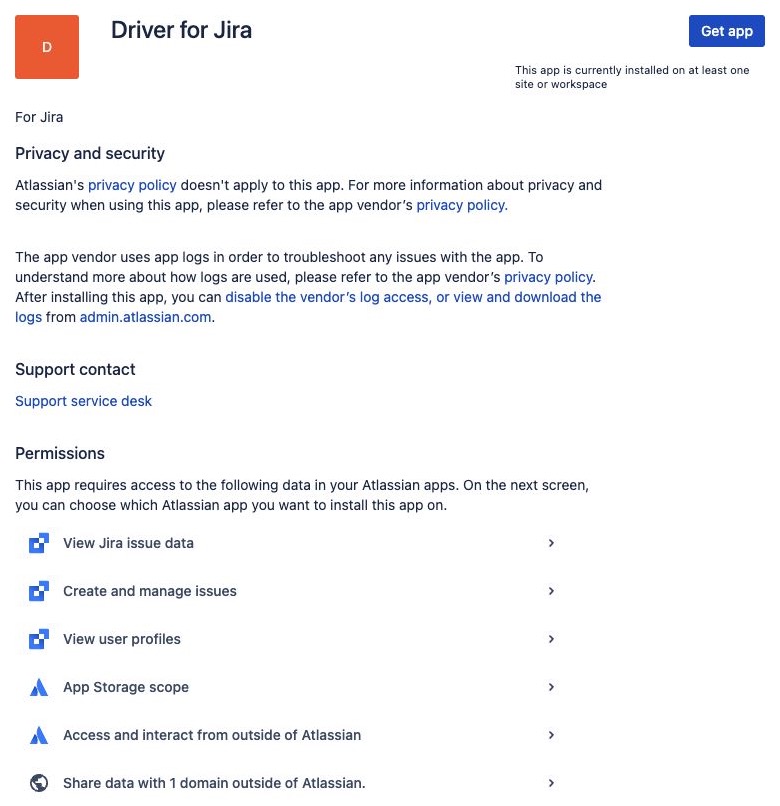
Review the requested permissions before installing Driver for Jira. View full size.
Enter the pairing code
- Return to Driver and choose Generate Pairing Code. The code is valid for 15 minutes.
- In Jira, open the app’s Driver Setup page from its Get started experience.
- Paste the code into Pairing Code and choose Pair with Driver.
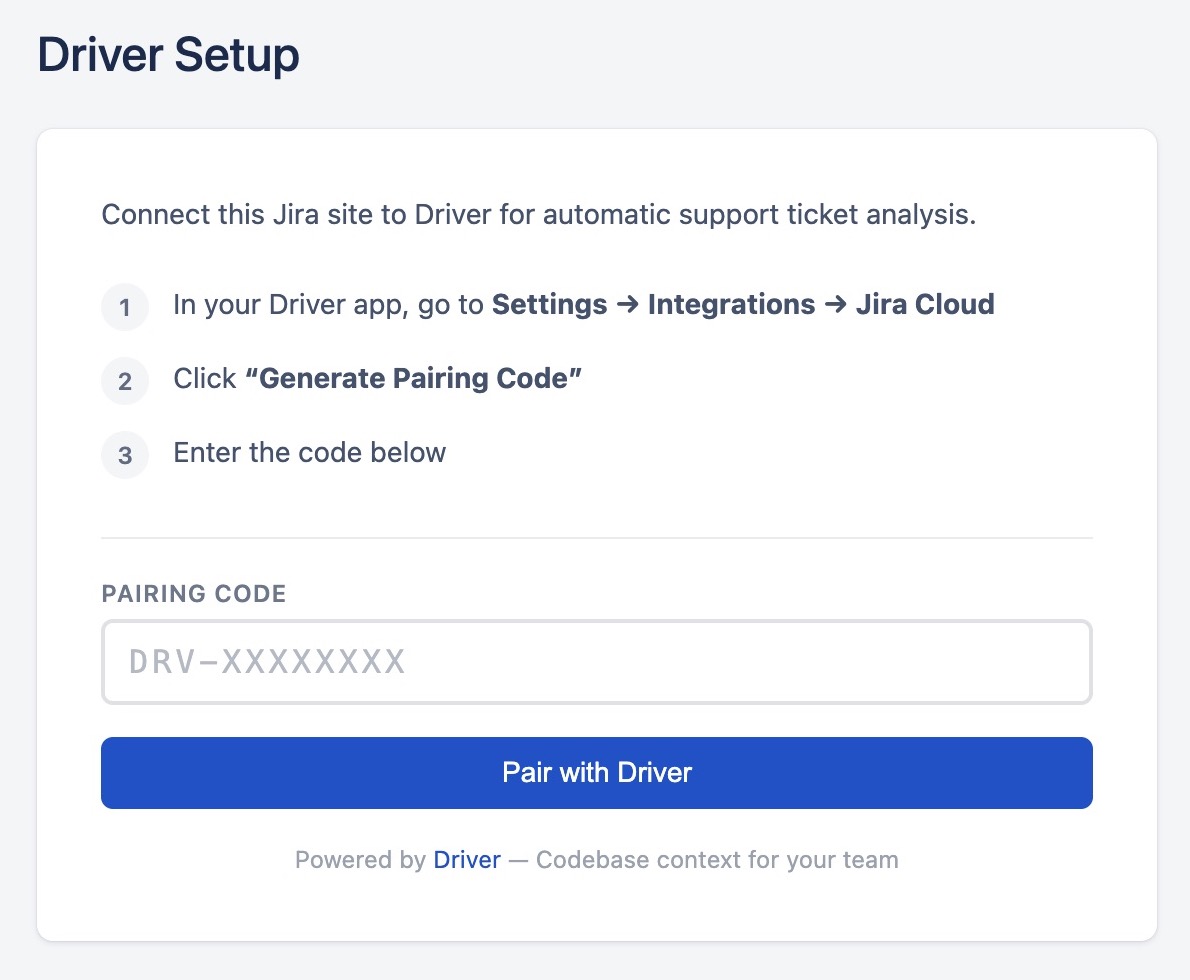
Paste the pairing code from Driver into Driver Setup in Jira. View full size.
Generate a new pairing code if the previous one expires. Check the Jira site and Driver organization before pairing so tickets connect to the intended organization.
Confirm the connection
Jira shows Connected to Driver! when pairing succeeds. Return to Driver and confirm that the intended Jira site is connected, then configure project access below. Turn on Automatic triage for each project where newly created tickets should be investigated.
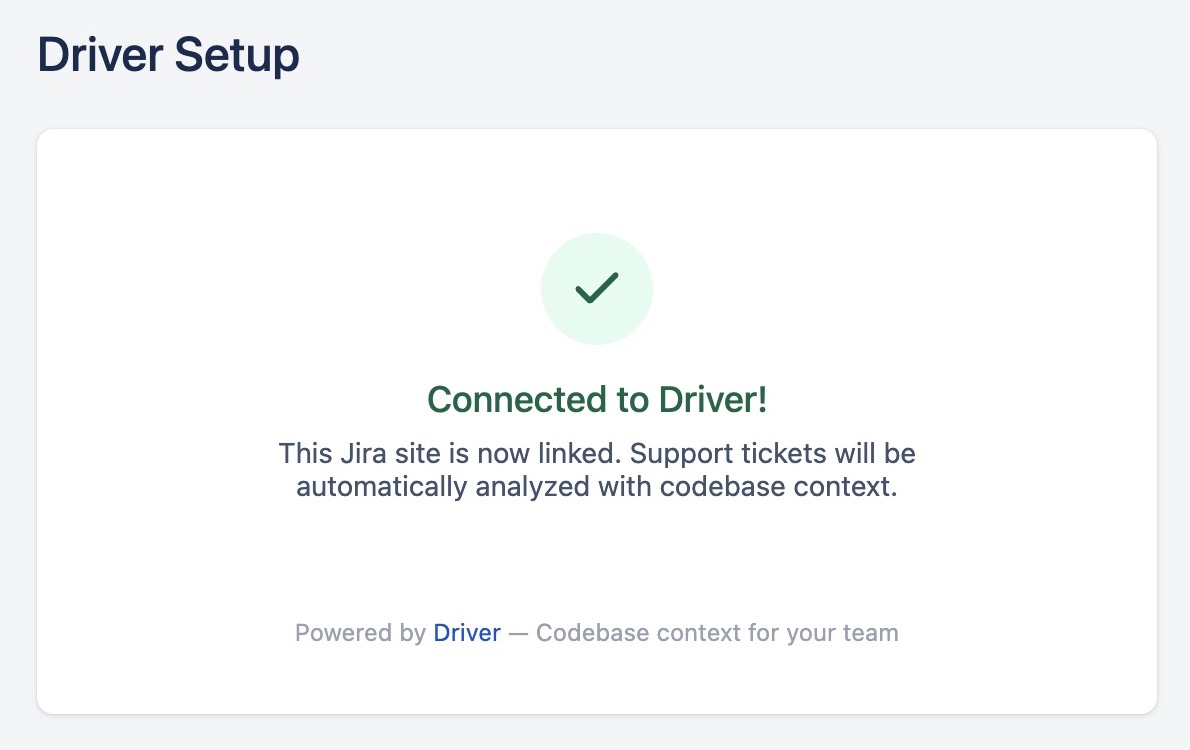
After pairing succeeds, return to Driver to configure project access and Automatic triage. View full size.
Jira app settings
Open Driver Setup in Jira to check whether the app is connected. The page provides Pair with Driver for an unpaired app and Disconnect for an existing connection. Project access, automatic investigations, and ticket fields are configured in Driver, as described below.
Configure project access
In Settings > Integrations > Jira Cloud, choose Add project under Project Scopes. Select the Jira project, then choose Add Scope. After the project appears in the list, click its name to open Project scope configuration and review its behavior settings.
| Setting | What to configure |
|---|---|
| Automatic triage | Turn automatic investigations on or off. Only tickets created after it is enabled are investigated automatically. |
| Jira Custom Fields | Choose the custom fields Driver should receive as ticket context. |
| Automated report sections | Choose whether to include Summary, Likely cause, SOPs, Related tickets, and Likely routing team in the Jira report. |
| Project status | Check whether the project scope is active or paused. |
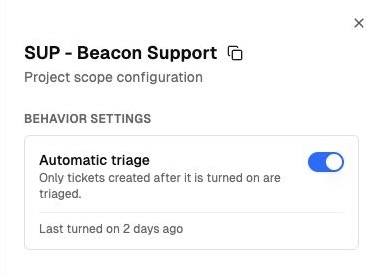
Enable Automatic triage to investigate newly created tickets in this project. View full size.
Review repository permissions through Settings > Access Control. See Access control and Automatic Jira investigations.
Use the connection
Paste a Jira ticket URL into Investigations to investigate it directly. For automatic work, create a new ticket in a project where Automatic triage is on, then check Driver’s report on the ticket.
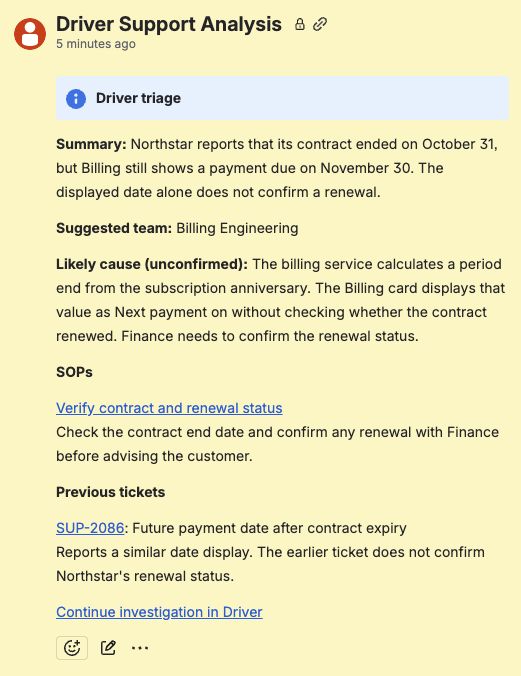
Read the automated findings on Jira, then continue the investigation in Driver. View full size.
Select Continue investigation in Driver to open the automated starting point. Sending a message starts your private continuation. Review and copy any follow-up information your teammates need into Jira through your normal workflow.